制作WEBGL比特币铭文
我想创建一个 HTML5 网站,无需外部库即可渲染 WebGL 片段着色器。 其次,将该项目作为 Ordinal NFT 记录到比特币区块链上。本文记录了完整的操作过程。

一键发币: x402兼容 | Aptos | X Layer | SUI | SOL | BNB | ETH | BASE | ARB | OP | Polygon | Avalanche
我是一名软件/硬件开发人员和视频艺术家,喜欢创造不存在的技术,目的是赋予他人权力。 尽我最大努力寻找每个人都可以使用的工具。 我对这个项目有两个目标。 首先,我想创建一个 HTML5 网站,无需外部库即可渲染 WebGL 片段着色器。 其次,将该项目作为 Ordinal NFT 记录到比特币区块链上。
为什么这很重要?
- OpenGL 通过直接与 GPU 一起工作来实现高保真图形。 WebGL 是 OpenGL 的网络版本。 如果你在过去 30 年里使用过计算机,那么你就体验过 OpenGL 图形。 例如,Three.js 是一个用户友好的 WebGL 包装器。
- 帮助其他人突破比特币区块链图形可能性的极限。
- 着色器代码很小,非常适合作为铭文。 从技术上讲,据我所知,着色器没有大小限制。
- 没有外部依赖。 HTML5 + Javascript 就是你所需要的。
- HTML5 + WebGL 网站示例铭文尚未出现。
1、HTML5模板
首先,我需要一个工作示例来演示如何在 HTML5 文件中运行 WebGL 示例。 关键是找到一个加载片段着色器的示例。 幸运的是,我从 Pablo Colapinto 找到了一个可以在本地运行的示例,无需任何外部依赖项。 这个例子粘贴在下面:
<html>
<script type="text/javascript">

var GL;
var shaderId;
var vertexBuffer;
var indexBuffer;
var timer = 0;

function initWebGL(){
    // Get Canvas Element
    var canvas = document.getElementById("glcanvas");
    // Get A WebGL Context
    GL = canvas.getContext("webgl") || canvas.getContext("experimental-webgl");
    // Test for Success
    if (!GL) {
      alert("Unable to initialize WebGL. Your browser may not support it.");
    }
    // Set clear color to red, fully opaque
    GL.clearColor(1.0, 0.0, 0.0, 1.0);
    // Clear Screen
    GL.clear(GL.COLOR_BUFFER_BIT| GL.DEPTH_BUFFER_BIT);

    initShaderProgram();
    initBuffers();
}

function initShaderProgram(){

    //Create Program and Shaders
    shaderId = GL.createProgram();
    var vertId = GL.createShader(GL.VERTEX_SHADER);
    var fragId = GL.createShader(GL.FRAGMENT_SHADER);

    //Load Shader Source (source text are in scripts below)
    var vert = document.getElementById("vertScript").text;
    var frag = document.getElementById("fragScript").text;

    GL.shaderSource(vertId, vert);
    GL.shaderSource(fragId, frag);

    //Compile Shaders
    GL.compileShader(vertId);
    GL.compileShader(fragId);

    //Check Vertex Shader Compile Status
    if (!GL.getShaderParameter(vertId, GL.COMPILE_STATUS)) {
        alert("Vertex Shader Compiler Error: " + GL.getShaderInfoLog(id));
        GL.deleteShader(vertId);
        return null;
    }

    //Check Fragment Shader Compile Status
    if (!GL.getShaderParameter(fragId, GL.COMPILE_STATUS)) {
        alert("Fragment Shader Compiler Error: " + GL.getShaderInfoLog(id));
        GL.deleteShader(fragId);
        return null;
    }

    //Attach and Link Shaders
    GL.attachShader(shaderId, vertId);
    GL.attachShader(shaderId, fragId);
    GL.linkProgram(shaderId);

    //Check Shader Program Link Status
    if (!GL.getProgramParameter(shaderId, GL.LINK_STATUS)) {
      alert("Shader Linking Error: " + GL.getProgramInfoLog(shader));
    }

}

function initBuffers(){

    //Some Vertex Data
    var vertices = new Float32Array( [
      -1.0, -1.0, 0.0,
      -1.0,  1.0, 0.0,
       1.0,  1.0, 0.0,
       1.0, -1.0, 0.0
    ]);
    //Create A Buffer
    vertexBuffer = GL.createBuffer();
    //Bind it to Array Buffer
    GL.bindBuffer(GL.ARRAY_BUFFER, vertexBuffer);
    //Allocate Space on GPU
    GL.bufferData(GL.ARRAY_BUFFER, vertices.byteLength, GL.STATIC_DRAW);
    //Copy Data Over, passing in offset
    GL.bufferSubData(GL.ARRAY_BUFFER, 0, vertices );

    //Some Index Data
    var indices = new Uint16Array([ 0,1,3,2 ]);
    //Create A Buffer
    indexBuffer = GL.createBuffer();
    //Bind it to Element Array Buffer
    GL.bindBuffer(GL.ELEMENT_ARRAY_BUFFER, indexBuffer);
    //Allocate Space on GPU
    GL.bufferData(GL.ELEMENT_ARRAY_BUFFER, indices.byteLength, GL.STATIC_DRAW);
    //Copy Data Over, passing in offset
    GL.bufferSubData(GL.ELEMENT_ARRAY_BUFFER, 0, indices );

}

//ANIMATION FUNCTION (to be passed a callback)  see also http://www.paulirish.com/2011/requestanimationframe-for-smart-animating/
window.requestAnimFrame = ( function() {

    //Find best option given current browser
    return  window.requestAnimationFrame ||
            window.webkitRequestAnimationFrame ||
            window.mozRequestAnimationFrame ||
            window.oRequestAnimationFrame ||
            window.msRequestAnimationFrame ||

    // if none of the above, use non-native timeout method
    function(callback) {
      window.setTimeout(callback, 1000 / 60);
    };

  } ) ();

function animationLoop(){
    // feedback loop requests new frame
    requestAnimFrame( animationLoop );
    // render function is defined below
    render();
}

function render(){
    timer+=.1;

    //Bind Shader
    GL.useProgram(shaderId);
    //Update uniform variable on shader
    var uID = GL.getUniformLocation(shaderId, "uTime");
    GL.uniform1f(uID, timer);
    //Enable Position Attribute
    var attId = GL.getAttribLocation(shaderId, "position");
    GL.enableVertexAttribArray(attId);
    //Bind Vertex Buffer
    GL.bindBuffer(GL.ARRAY_BUFFER, vertexBuffer);
    ///Point to Attribute (loc, size, datatype, normalize, stride, offset)
    GL.vertexAttribPointer( attId, 3, GL.FLOAT, false, 0, 0);
    //Bind Index Buffer
    GL.bindBuffer(GL.ELEMENT_ARRAY_BUFFER, indexBuffer);
    //Draw!      --( mode, number_of_elements, data type, offset )
    GL.drawElements(GL.TRIANGLE_STRIP, 4, GL.UNSIGNED_SHORT, 0);
}

function start(){
    initWebGL();
    animationLoop();
}

</script>

<!-- VERTEX SHADER SOURCE -->
<script id="vertScript" type="text/glsl">

  #ifdef GL_ES
  precision lowp float;
  #endif

  attribute vec3 position;

  void main(void) {
    gl_Position = vec4(position,1.0);
  }

</script>

<!-- FRAGMENT SHADER SOURCE -->

<script id="fragScript" type="text/glsl">
<!-- ADD GLSL SHADER CODE HERE -->
  #ifdef GL_ES
  precision lowp float;
  #endif

  #define PI 3.14159265359

  uniform float uTime;

  void main(void) {

    //divide pixel location by canvas width and height
    //to get values are now between 0.0 and 1.0
    vec2 st = gl_FragCoord.xy/vec2(640,480);
    //some fun functions for picking colors
    float r = sin(uTime+8.*PI*st.x);
    float g = fract( sin(3.*PI*st.y) );
    float b = sin(uTime+PI*st.x*st.y);
    vec3 color = vec3(r,b,g);
    gl_FragColor = vec4(color,1.0);
  }
</script>

<body onload = start() >
<canvas id="glcanvas" width=640 height=480 style = "margin:auto; display:block">
 Oops, browser has no <code> canvas </code> tag support
</canvas>
</body>

</html>
我查找 fragment shader部分并从 <script>标记内删除了代码。 从模板中删除代码后,它应该如下所示。
...
<!-- FRAGMENT SHADER SOURCE -->
<script id="fragScript" type="text/glsl">
<!-- ADD GLSL SHADER CODE HERE -->
</script>
...
然后,我将 GLSL 着色器或片段着色器粘贴到此处显示Add GLSL Shader Code的区域。
<!-- FRAGMENT SHADER SOURCE -->
<script id="fragScript" type="text/glsl">
<!-- ADD GLSL SHADER CODE HERE -->
    #ifdef GL_ES
    precision mediump float;
    #endif

    #define PI 3.14159265359

    uniform vec2 uResolution;
    uniform vec2 uMouse;
    uniform float uTime;

    float plot(vec2 st, float pct){
      return  smoothstep( pct-0.02, pct, st.y) -
              smoothstep( pct, pct+0.02, st.y);
    }

    void main() {
        vec2 st = gl_FragCoord.xy/vec2(640,480);
        st -= 0.5;
        st *= 12.0;
        float pct2 = 0.0;
        pct2 = distance(st,vec2(0.5));

        float y3 = sin(cos((st.y)*(0.10)))-sin(st.x+st.y*02.2);
        float y = smoothstep(1.2-(sin(((y3)))*(cos(st.y/-9.2))),0.5,st.x) - smoothstep(0.5,0.1,(st.x*0.2))+(sin(st.x-(uTime*.0412)));
        float y2 = smoothstep(04.91,02.5,st.y+st.x) - smoothstep(0.481,0.918,st.y);
        vec3 colorA = vec3(y*y2)-(y3-(0.14))*(sin(st.x-(uTime*.02412)));
        colorA = (1.0)*colorA*vec3(.020+(sin(((y3+y)))+(cos(pct2*-0.2))),0.120,(0.10+(sin(y3))));

        float y4 = cos(cos((st.x)*(0.13)*sin(0.23)));
        float y5 = smoothstep(0.2,0.25,0.3) - smoothstep(0.25,0.31,(st.y*0.12));
        float y6 = smoothstep(0.9+(st.x*0.012),0.1915,st.y+cos(st.y)) - smoothstep(0.641,0.8191,(st.x+st.y)*0.2);
        vec3 colorB = vec3(y4+y5)-(y3*(0.913))*(sin(st.x+(uTime*.031592)));
        colorB = (1.0)*colorB*vec3(.920,0.95030,(0.20-y6))*(sin(st.y-(uTime*.032412)));

        vec2 bl = step(vec2(0.5),st);
        float pct = bl.x * bl.y;
        vec3 colorMix = vec3(0.0);
        colorMix = mix(colorA*0.432, colorB+0.3892, 0.983*(sin(((y6+y2)))*(cos(pct2/-2.2))));

        gl_FragColor = vec4(colorMix,1.0);
    }
</script>
将文件另存为新的 index.html。 检查着色器光栅是否正确:
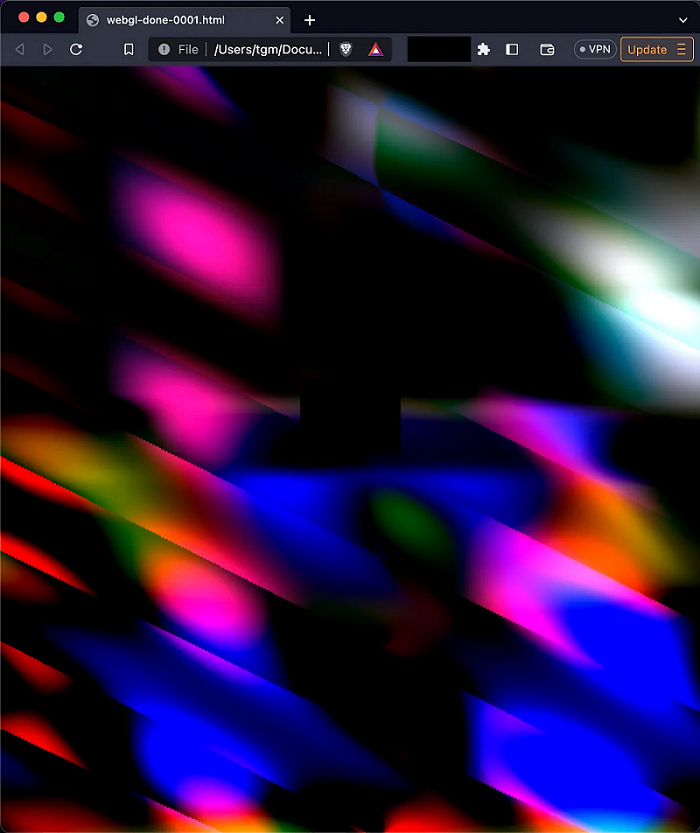
我们已经在本地进行了测试,并且运行符合预期。 如果你好奇的话,代码就在这里。 是时候刻入区块链了。
2、刻录 HTML 文件
前往lookordinal,这是一个具有成本效益的自我保管批量铭文网站。 该网站如下图所示:
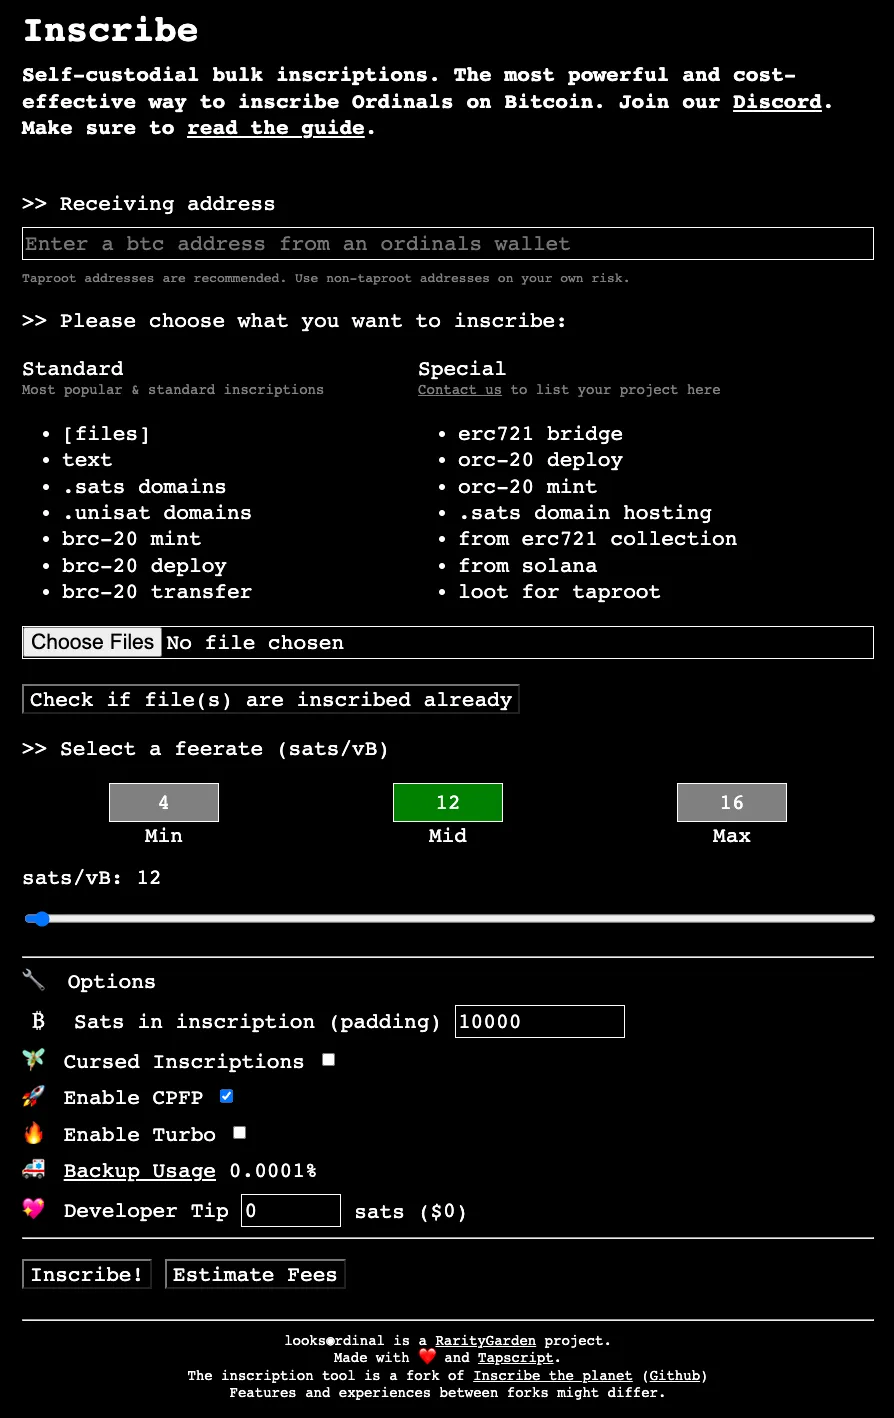
将你的序数地址添加到接收地址部分。 不要忘记你的序数地址与你的 BTC 收件人地址不同。

选择想要刻录的文件。 在这里,它是 index.html。
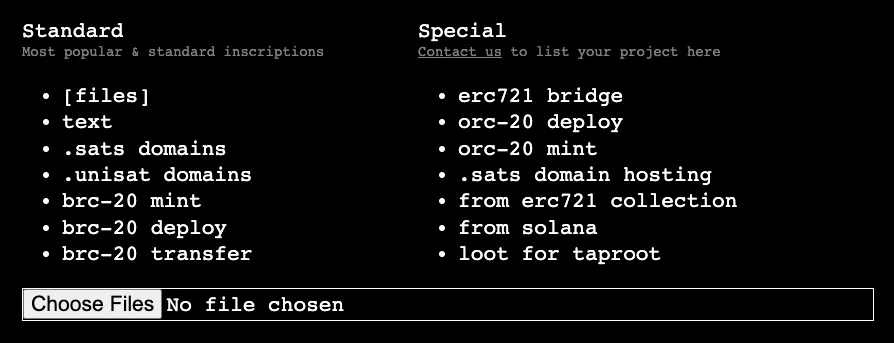
选择免费率。 我建议中,因为如果你选择分钟,你就有可能等待很长时间才能完成铭文。 不要忘记给你的开发人员小费!
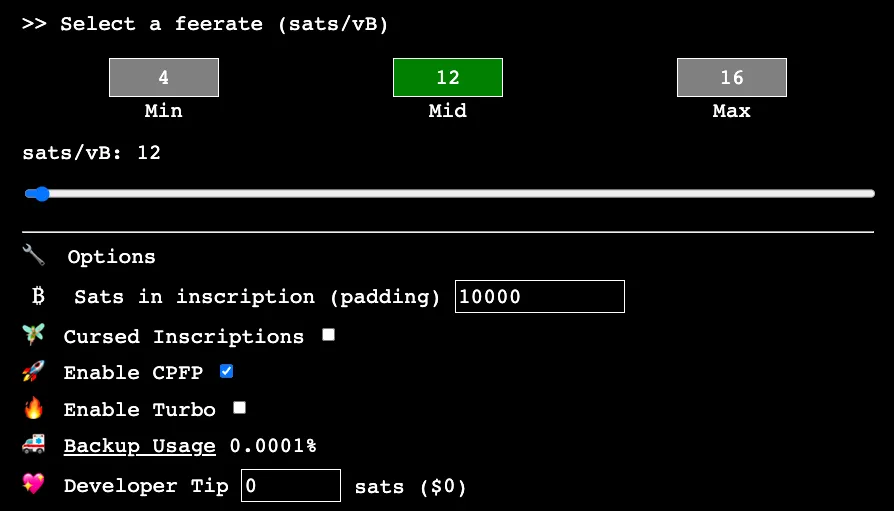
单击 estimate fees查看铭文的费用。 然后按下 inscribe按钮。

页面将转换至付款流程。 使用你喜欢的比特币应用程序扫描二维码,然后将付款发送到提供的地址。
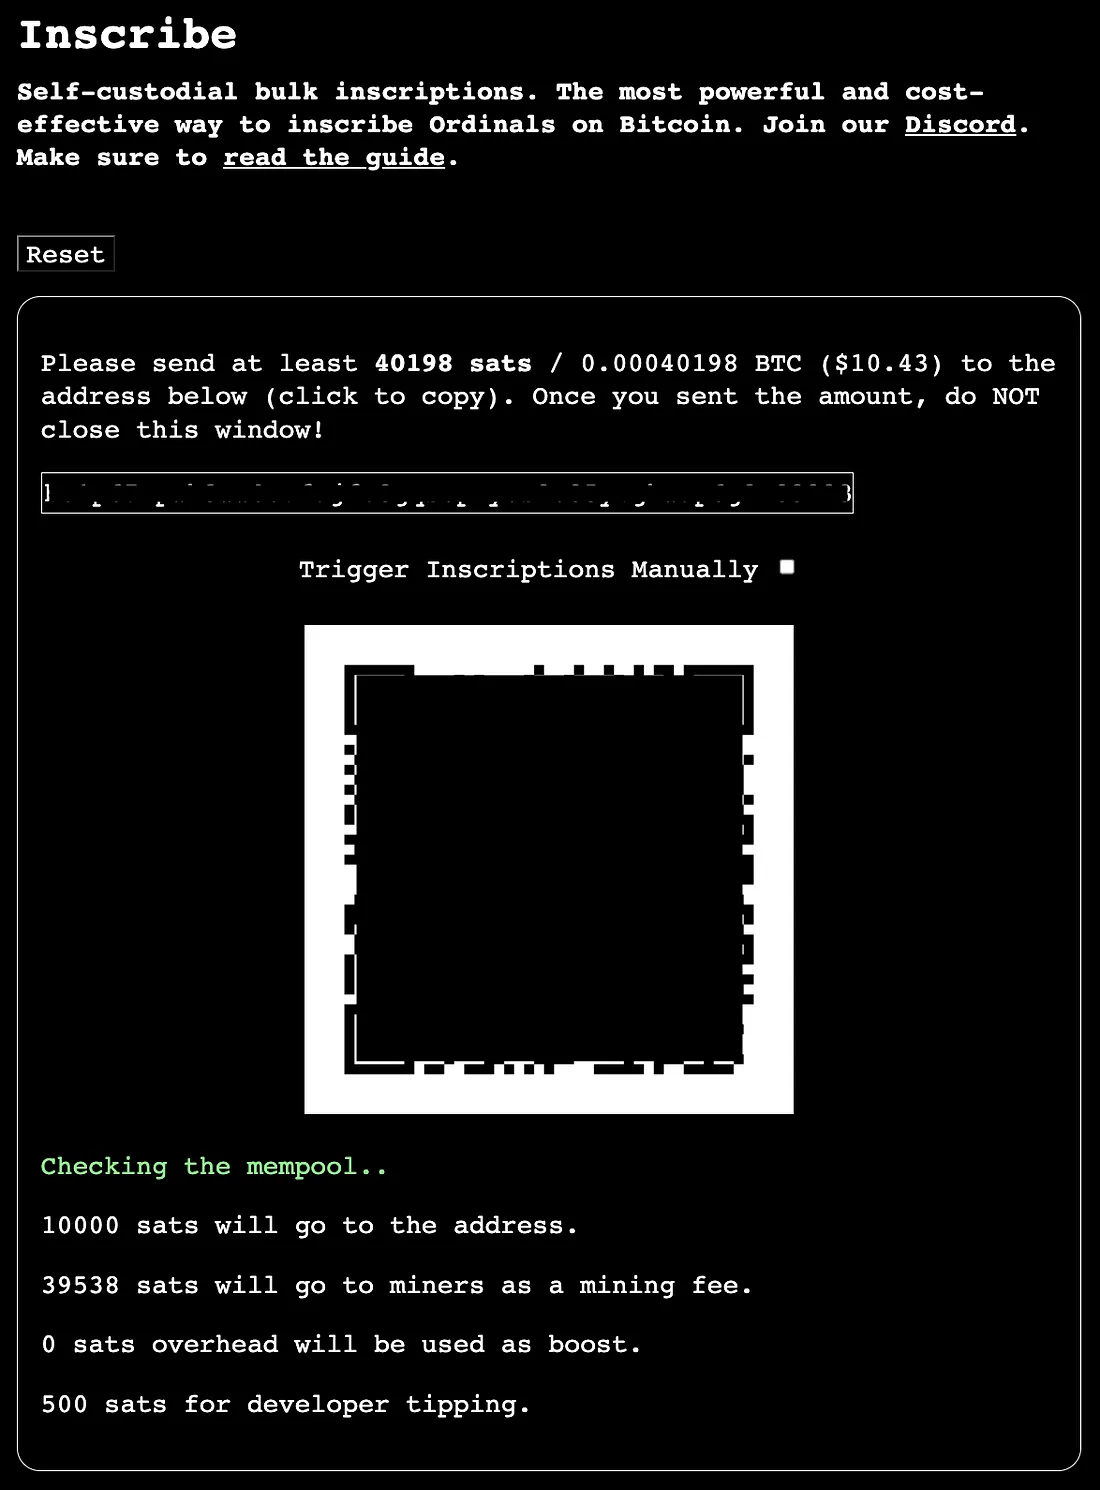
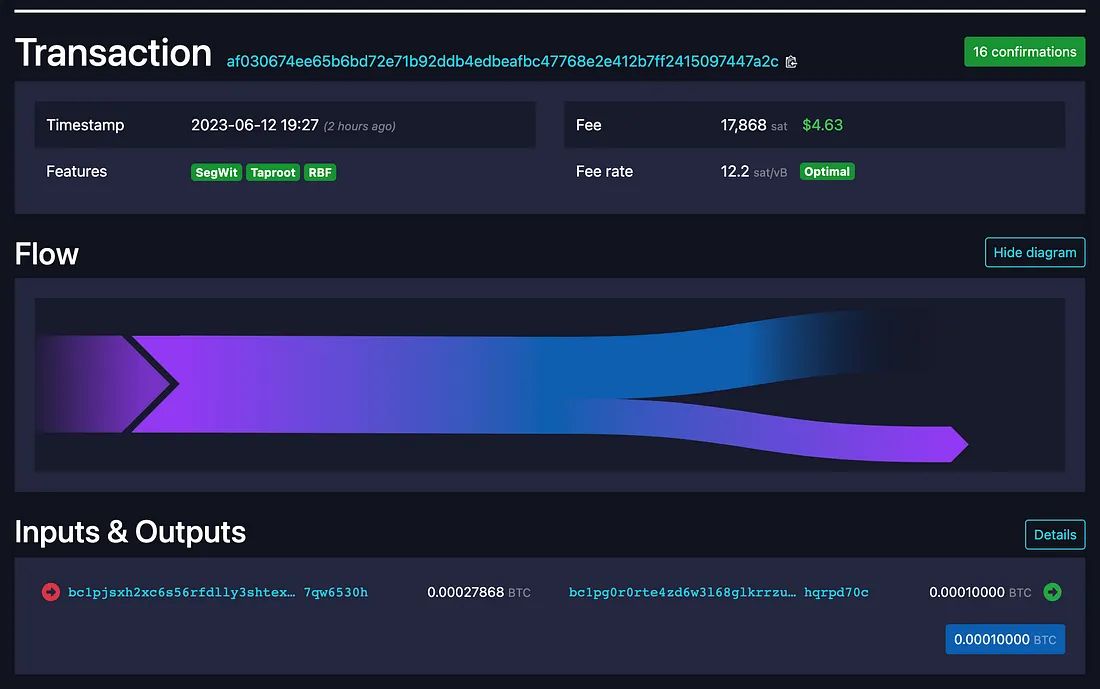
收到付款后,铭文过程就开始了。 单击交易链接:
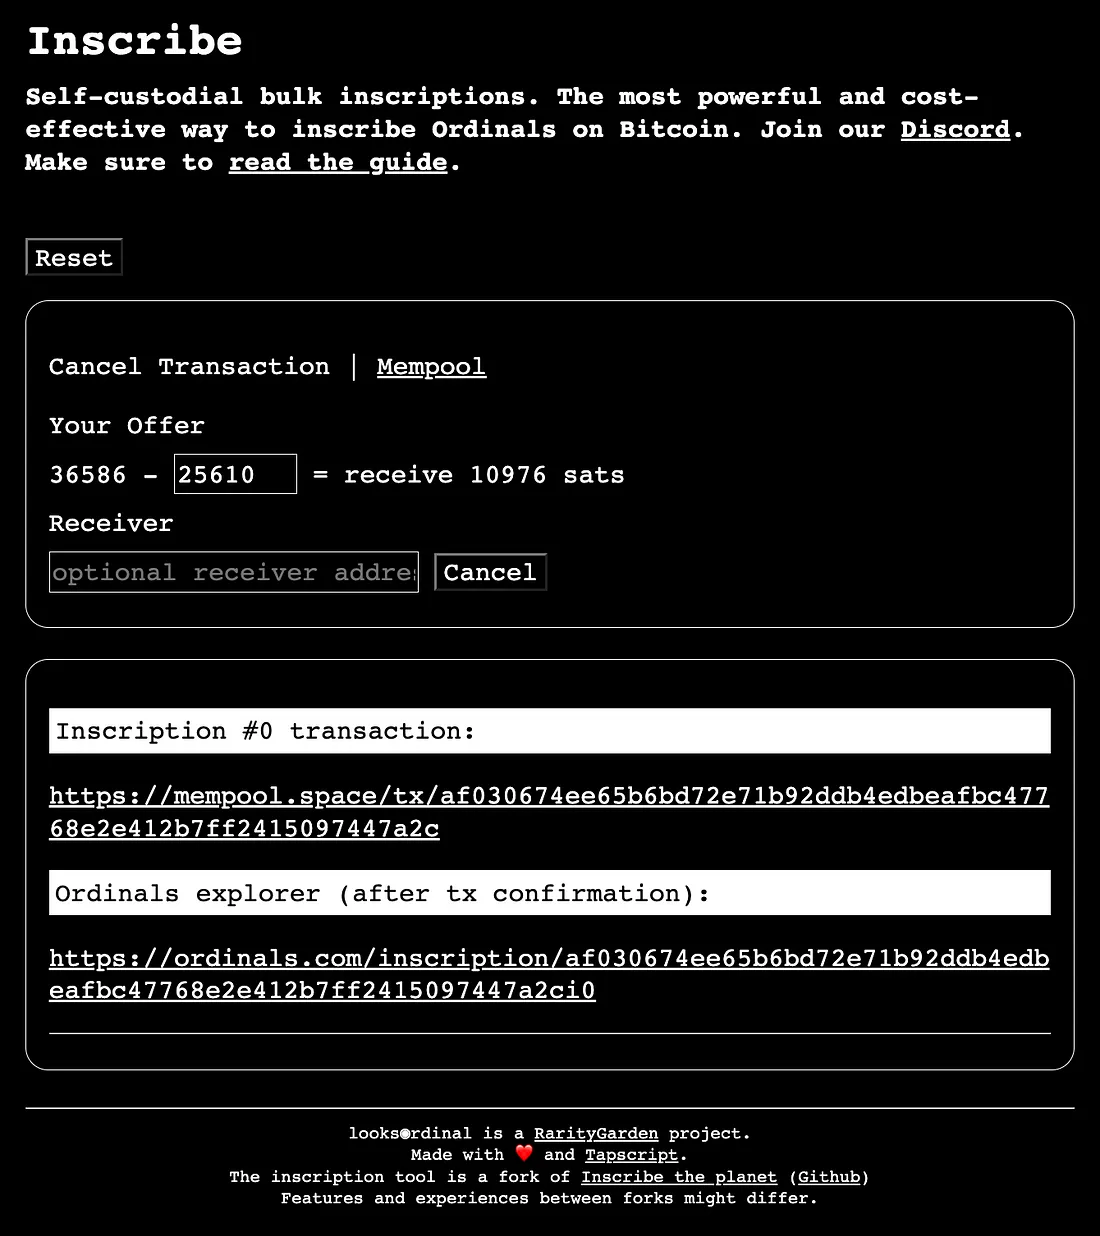
使用 mempool.space 跟踪你的铭文刻录进度:
铭文刻录完成后,请在 Magic Eden 或 Gamma.io 上查看。
3、结束语
这是首次将兼容 WebGL 的 HTML5 网页写入比特币区块链。 对于去中心化图形来说,这是一个重要的时刻,并推动了人们对区块链如何使用的认知。 轮到你了,改变世界。
原文链接:Inscribing the first 1:1 WebGL + HTML5 Bitcoin Ordinal
DefiPlot翻译整理,转载请标明出处
免责声明:本站资源仅用于学习目的,也不应被视为投资建议,读者在采取任何行动之前应自行研究并对自己的决定承担全部责任。